
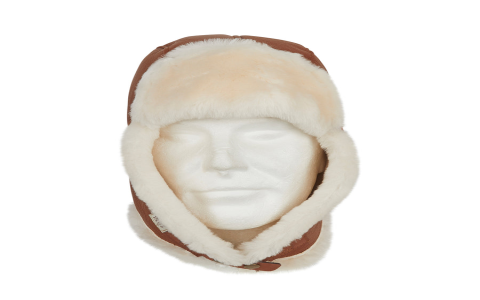
Alright, so I got really into this whole knitting thing a while back, and I wanted to try something a bit different. That’s when I stumbled upon the idea of making an Iraqi hat. I’d seen some pictures online, and they looked pretty cool, so I figured, why not give it a shot?
First things first, I needed to find a pattern. I searched online, and honestly, it took a bit of digging around. Eventually, I found a couple of patterns that looked promising, but not a lot of options. I read through a few discussion boards and finally picked one that seemed straightforward enough, even for a relative beginner like me.
Next up, the yarn. The pattern suggested a specific type of yarn, but I couldn’t find it at my local craft store. So, I did some more research online to figure out a good substitute. I ended up going with a similar weight yarn that I thought would work just as well. It wasn’t a big deal, just a slight change.
Then came the needles. I already had a bunch of knitting needles, but I needed to make sure I had the right size for this project. Luckily, I found a pair that matched what the pattern called for. They were a bit older, but hey, they still worked!
With all the supplies gathered, I sat down and got started. I cast on the stitches as the pattern instructed. It was a bit tricky at first, getting the tension right, but I got the hang of it after a few rows. I just followed the pattern step by step, row by row. It was pretty relaxing, actually. Just me, my needles, and the yarn, slowly forming this hat.
- Round 1: I remember making my first round, it was the base of the hat. I kept double-checking the pattern to make sure I was doing it correctly.
- Next few rounds: Then came the increases. This part was a bit more challenging, as I had to add stitches at certain points. But I took it slow and made sure to count my stitches after each round.
- Body of the hat: Once the base was done, it was mostly smooth sailing. I just kept knitting in the round, following the pattern for the main body of the hat. This was the longest part, but it was also the most satisfying, as I could really see the hat taking shape.
- Decreases: Near the top, I had to start decreasing stitches to shape the crown of the hat. It was similar to the increases, just in reverse. I just had to pay attention to where to decrease so that it would taper nicely.
- Finishing: Finally, I bound off the last few stitches and wove in the ends. And there it was, my very own Iraqi hat!
It wasn’t perfect, of course. There were a few wonky stitches here and there, but overall, I was pretty proud of myself. It was a fun project, and I learned a lot along the way. Plus, now I have a unique hat to show off! I might even try making another one sometime, maybe with a different pattern or yarn. We’ll see!
It took me a good few evenings to complete, especially since I’m not the fastest knitter. But it was totally worth it. I wore it out the other day, and a few people even asked me where I got it. Felt pretty good to say I made it myself! This whole project really showed me that with a little patience and effort, you can create some pretty cool stuff.


